DIY antique burlap floor lamp

DIY burlap floorlamp - oldpinehouse.wordpress.com

DIY burlap floorlamp - oldpinehouse.wordpress.com    DIY burlap floorlamp - oldpinehouse.wordpress.com

The lamp is finished!  In my last post (here), I took this old lamp which was lovely but not quite the style I needed, primed it and was trying to decide on my next steps.   Spray-paint was my first option, but after testing it I realised it wouldn’t look as realistic as I was hoping.  Then I discovered the great American invention Rub n Buff……………..

Here’s how to do it yourself

The base

1 – Find an old lamp – this cost $10!

DIY burlap floorlamp - oldpinehouse.wordpress.com  DIY burlap floorlamp - oldpinehouse.wordpress.com      DIY burlap floorlamp - oldpinehouse.wordpress.com

Cover anything you don’t want to paint (e.g. wires) in primer. I used white, but wish I had chosen grey.  Leave at least 24 hours.  See here for more details!

2 – Cover the base in antique gold Rub n Buff (I got mine from Blic art store), rubbing on with bare fingers, then buffing with an old cloth.  Leave at least 24 hours.  Realise that you don’t really like the colour because it doesn’t look metallic enough!

DIY burlap floorlamp - antique gold Rub n Buff - oldpinehouse.wordpress.com992

3 – Gently apply several coats of Spanish Copper Rub n Buff, applying the first layer quite thickly with very little buffing to fully cover with colour, then the following layers thinly with lots of gently buffing.  I found this out because the spanish copper doesn’t spread as evenly and can rub off the original layers.  Watch several movies during this process.

It turned out to have a lovely copperish hue – with an extra red tint from the antique gold underneath

DSCN6187 DSCN6188

The base is done!

The shade

1 – Take off any existing material, until you’re down to the bare shade

2 – Buy a cheap glue gun (mine was $2.50!)

3 – Take burlap and wrap around shade, gluing in place at regular intervals – I used painters tape to hold the shade in place.  Don’t use too much glue though as some of it started to show through the plastic.  Once the burlap smoothly covers the sides, cut and stick down a narrow margin over the top and bottom.

DIY burlap floorlamp - oldpinehouse.wordpress.com DIY burlap floorlamp - oldpinehouse.wordpress.com DIY burlap floorlamp - oldpinehouse.wordpress.com DIY burlap floorlamp - oldpinehouse.wordpress.com DIY burlap floorlamp - oldpinehouse.wordpress.com

4 – I’m not that neat, so I realised that my wiggly base line showed through when the lamp was on.  So I made margins using more burlap and heat n bond.  I folded a 4 inch wide strip in half, then folded each side in half again & stuck in place using an iron and heat n bond, using a cloth to stop everything sticking to the iron!

DIY burlap floorlamp - oldpinehouse.wordpress.com  DIY burlap floorlamp - oldpinehouse.wordpress.com

Finished!

Here’s a before & after :)

Before - DIY burlap floorlamp - oldpinehouse.wordpress.com   DIY burlap floorlamp - oldpinehouse.wordpress.com

Stars, stripes and pine trees

Howdy!

Around a year ago, my fiancé was offered a job as a rocket scientist in Iowa. Yep, that really happens to some people! My fiancé, J, is a physicist and I research weather and climate in Africa, so both very cool jobs that in reality involve lots of swearing at computer screens.

At the time we were based in Milton Keynes in the UK, a town famous for concrete cows, roundabouts and 60s architecture, so the idea of emigrating to start a dream job was exciting and scary in equal measure.  We know nothing of the mid-west, apart from the vague idea that it would be flat!

After a lot of packing and a new job for me, we said our goodbyes and jumped on a plane to Iowa… only to find that it wasn’t so flat after all.  We spent a few panicked weeks house-hunting and watching spring start to arrive and ended up in a beautiful old brick house on a cobbled street, surrounded by pine trees.

This blog is mostly about that house, and how we are making it our own.  In October, we are also returning home to the beautiful Welsh boarders to get married, so there might be a little about that too.  I’ll try and write a blog post every week, but if I go quiet occasionally then bear with me!

And finally it’s about settling into life in Iowa, the strangeness and the fun.  And if you’re really interested, the rocket science ;)

Concrete cows in Milton Keynes

Concrete cows in Milton Keynes


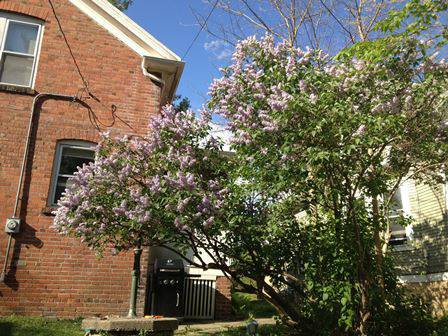
Our new house

Our lovely new house

Bricks and lilac

Complete with pine trees

Complete with pine trees