DIY Wine crate shelves

Tutorial on how to make some cheap and easy DIY wine crate bookshelves

DIY wine box shelves Travel and recipe book storage

DIY wine box shelves Travel and recipe book storage

Sorry for the lack of posts recently – I’m getting married soon(!), so life has suddenly become very hectic.  I promise to post more over the next few weeks.

A few weeks ago, we realised that we were already running out of shelves despite our recent mammoth IKEA trip (4hrs drive each way and IKEA in the middle.. never again).  Instead of going for cheap target shelves, I thought I would try and imagine up some more homemade options and fell in love with these ideas

It didn’t look too hard, so off we went to find some wine crates!  Our local wine-store gave us a few beautiful bordeaux crates for free and we found the rest in Michaels

We gave them a quick sand down, added a coat of Miniwax driftwood stain (which is much warmer a colour than the greyish rustoleum one) and stacked them up to form bookshelves.  In the end we didn’t even need to fix them in place with the weight of the books – so we can rearrange them any time we like.

Simple!

Working out the right alignment - bare wood shelves

Working out the right alignment – bare wood shelves

Pre-staining

Pre-staining

Staining the crates with driftwood stain - the slight roughness on the wood gave it a more rustic feel

J staining the crates with driftwood stain – the slight roughness on the wood gave it a more rustic feel

Finished wine crate shelves!

Finished wine box shelves!

Xx

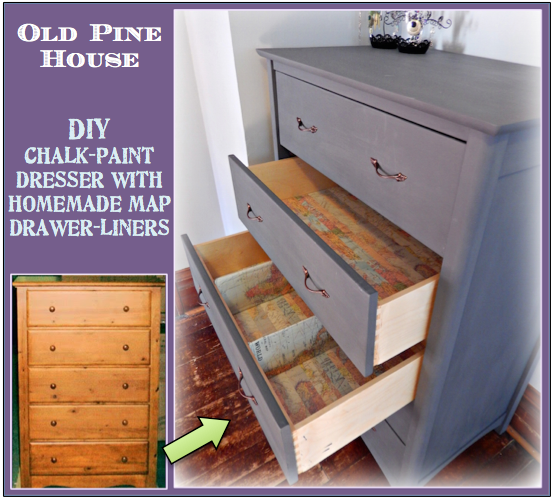
DIY chalk paint drawers with world map dividers – The reveal!

DIY chalk paint drawers

The drawers are complete! Here’s the big reveal and a few more details for you :)  After a few pics, there is also a super simple recipe to create your own!

Finished drawers!

Finished! Complete with Etsy barn mirror from Upcycle Avenue and copper wire string lights from Frux Home and Yard

Custom map lining for drawers

Custom map lining and dividers – see below for details!

Chalk paint DIY drawers

Now we just need some pictures on the wall….

OK, here’s what we did for the drawers and the linings

THE DRAWERS – start with my last post here

 – Find old chest of drawers from a charity store

 – Remove old drawer knobs, fill the holes with pollyfiller/spacking and give it a quick clean

 – Give it 2-3 coats of grey chalk paint (recipe and instructions in my last post here).  Some people also give the furniture a coat of wax but we decided we liked the chalky texture

 – Measure and drill new holes.  Screw in new drawer handles.  We chose these from Lowes

Lowes drawer handles

Lowes drawer pulls

Adding in drawer handles

J creating new drawer pull holes

Measuring and adding in new drawer pull holes

J hard at work

THE LINING

 – The first part is simple. I found some old map wrapping paper at PaperChase and on E-bay, then cut and glued it into the base of the drawer 

 – For the drawer dividers, I cut some plywood wine bottle separators to size (available for free from any good wine store!), stuck some cardboard on either side to make a smooth surface, then wrapped them as though they were presents in a world map.   Really pleased with them!

making drawer dividers

making drawer dividers

World map drawer dividers.  With my two homes in Europe and America, and my work in Africa!

World map drawer dividers. With my two homes in Europe and America, and my work in Africa!

and voila!  Completed drawers :) Much better than IKEA!

Custom map lining for drawers

Xx

Chalk paint and drawers

We got a little over excited when we went to the thrift store recently.  We were in need of a dresser or a chest of drawers and were planning an Ikea trip, but at 3hr each way to Chicago, this was no easy feat.  Plus the lovely IKEA hemnes drawers that I loved were completely out of our price range..
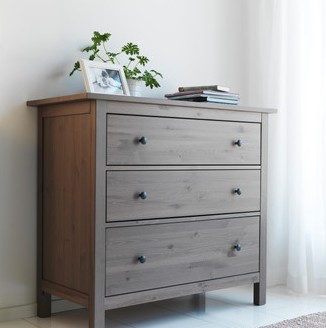
hemnes-chest-of--drawers__0132792_PE272809_S4

Inspiration! IKEA Hemnes drawers

So when we went to habitat-restore and discovered that they sold solid wood chests of drawers for under $50, my mind filled with all the ways we could decorate them!  Admittedly the initial chest wasn’t too pretty, especially as the top veneer had been chipped away and coffee stained
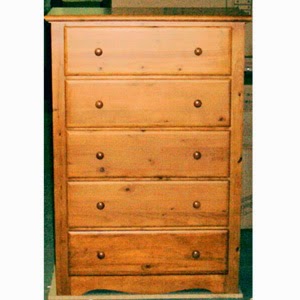
4535-pnemld

Similar chest of drawers to the one we bought – I forgot to take a photo of the exact ones

So we decided to give it a paint job.    First job was to give it a quick sand and to use polyfiller/spacking to fill in the drawer knob holes.

DSCN6047

Our trusty primer

DSCN6043

Hard at work

DSCN6046

We wanted to keep the insides of the drawers as wood, so most of our time was spend covering the insides with plastic bags. As always the actual priming took seconds…

Primed drawers

The wood grain inside the drawers was much prettier than the walnut veneer on the outside

Primed drawers

Priming done!

Someone had recommended using chalk paint, which seemed easy enough after reading this fantastic blog post:

In My Own Style – Testing 1… 2…. 3…. versions of chalk paint 

This is the rough recipe we ended up using:

1 – Mix plaster of paris with water, slowly adding the water until the mix had the consistency of single cream, or paint

2 – Mix 1 part of this with about 2 parts of paint.  Importantly, do not choose paint with primer or the mix will harden!

We chose Valspar contractor grade 2000 paint from Lowes and had it tinted Hematite.  We had left over chalk paint in the end, which was still liquid 1 month later, so not including primer seemed to work.

Painting was super easy – the paint went on smoothly and dried smoothly.  It was also incredibly easy to clean the paintbrushes  We gave it three coats in the end, but only because we kept painting late in the evening on the porch and kept missing bits in the low light!

Here’s the final painted result… although it doesn’t quite look like it in the photo, the colour matched almost exactly with the swatch.

You’ll have to wait until the next post for the detailing and the big reveal!

Xx

Painted drawers

DIY antique burlap floor lamp

DIY burlap floorlamp - oldpinehouse.wordpress.com

DIY burlap floorlamp - oldpinehouse.wordpress.com    DIY burlap floorlamp - oldpinehouse.wordpress.com

The lamp is finished!  In my last post (here), I took this old lamp which was lovely but not quite the style I needed, primed it and was trying to decide on my next steps.   Spray-paint was my first option, but after testing it I realised it wouldn’t look as realistic as I was hoping.  Then I discovered the great American invention Rub n Buff……………..

Here’s how to do it yourself

The base

1 – Find an old lamp – this cost $10!

DIY burlap floorlamp - oldpinehouse.wordpress.com  DIY burlap floorlamp - oldpinehouse.wordpress.com      DIY burlap floorlamp - oldpinehouse.wordpress.com

Cover anything you don’t want to paint (e.g. wires) in primer. I used white, but wish I had chosen grey.  Leave at least 24 hours.  See here for more details!

2 – Cover the base in antique gold Rub n Buff (I got mine from Blic art store), rubbing on with bare fingers, then buffing with an old cloth.  Leave at least 24 hours.  Realise that you don’t really like the colour because it doesn’t look metallic enough!

DIY burlap floorlamp - antique gold Rub n Buff - oldpinehouse.wordpress.com992

3 – Gently apply several coats of Spanish Copper Rub n Buff, applying the first layer quite thickly with very little buffing to fully cover with colour, then the following layers thinly with lots of gently buffing.  I found this out because the spanish copper doesn’t spread as evenly and can rub off the original layers.  Watch several movies during this process.

It turned out to have a lovely copperish hue – with an extra red tint from the antique gold underneath

DSCN6187 DSCN6188

The base is done!

The shade

1 – Take off any existing material, until you’re down to the bare shade

2 – Buy a cheap glue gun (mine was $2.50!)

3 – Take burlap and wrap around shade, gluing in place at regular intervals – I used painters tape to hold the shade in place.  Don’t use too much glue though as some of it started to show through the plastic.  Once the burlap smoothly covers the sides, cut and stick down a narrow margin over the top and bottom.

DIY burlap floorlamp - oldpinehouse.wordpress.com DIY burlap floorlamp - oldpinehouse.wordpress.com DIY burlap floorlamp - oldpinehouse.wordpress.com DIY burlap floorlamp - oldpinehouse.wordpress.com DIY burlap floorlamp - oldpinehouse.wordpress.com

4 – I’m not that neat, so I realised that my wiggly base line showed through when the lamp was on.  So I made margins using more burlap and heat n bond.  I folded a 4 inch wide strip in half, then folded each side in half again & stuck in place using an iron and heat n bond, using a cloth to stop everything sticking to the iron!

DIY burlap floorlamp - oldpinehouse.wordpress.com  DIY burlap floorlamp - oldpinehouse.wordpress.com

Finished!

Here’s a before & after :)

Before - DIY burlap floorlamp - oldpinehouse.wordpress.com   DIY burlap floorlamp - oldpinehouse.wordpress.com

Spray-painting my floor lamp

Hello

This is part 1 of my attempt to redesign an old floor lamp

We recently went to our goodwill store (habitat for humanity restore) and picked up this lamp for $10.

Original lamp

Original lamp

It’s old and solid, and gives a beautiful light – worth far more than we paid for it!  I had grand plans to give it a new lease of life with a paint job and a mod podge or burlap shade. Something along these lines..

This was my first time spray-painting something, but after checking out this post from apartment therapy (how to spray paint metal furniture), it didn’t look too hard..

I started by popping down to my local Ace to get some paint, primer and tape

Supplies for redecorating lamp

Supplies for redecorating lamp

I wanted an antique gold style lamp, so I went for the “hammered” effect paint – no idea how it will turn out!

I decided that it wasn’t worth spray painting the top part as it was gold anyway and would be hidden by the shade.  So I wrapped the top in two plastic bags, and carefully masked the edges with painters tape.  I did the same at the bottom with the cable

IMAG1647 IMAG1648

There have been a few posts that suggest you don’t need primer, but I didn’t want to take any chances, so I sprayed on a coat of white and left it out on our porch to dry.  It turns out spray painting is easy –  if I had realised, I would have done this years ago!  Here’s the primed version

One coat of primer and several mosquito bites later, I’ve checked the weather forecast, crossed my fingers and decided to leave it the full 24 hours to dry on the porch…  so, more tomorrow

IMAG1649

After a coat of primer

Stars, stripes and pine trees

Howdy!

Around a year ago, my fiancé was offered a job as a rocket scientist in Iowa. Yep, that really happens to some people! My fiancé, J, is a physicist and I research weather and climate in Africa, so both very cool jobs that in reality involve lots of swearing at computer screens.

At the time we were based in Milton Keynes in the UK, a town famous for concrete cows, roundabouts and 60s architecture, so the idea of emigrating to start a dream job was exciting and scary in equal measure.  We know nothing of the mid-west, apart from the vague idea that it would be flat!

After a lot of packing and a new job for me, we said our goodbyes and jumped on a plane to Iowa… only to find that it wasn’t so flat after all.  We spent a few panicked weeks house-hunting and watching spring start to arrive and ended up in a beautiful old brick house on a cobbled street, surrounded by pine trees.

This blog is mostly about that house, and how we are making it our own.  In October, we are also returning home to the beautiful Welsh boarders to get married, so there might be a little about that too.  I’ll try and write a blog post every week, but if I go quiet occasionally then bear with me!

And finally it’s about settling into life in Iowa, the strangeness and the fun.  And if you’re really interested, the rocket science ;)

Concrete cows in Milton Keynes

Concrete cows in Milton Keynes


Our new house

Our lovely new house

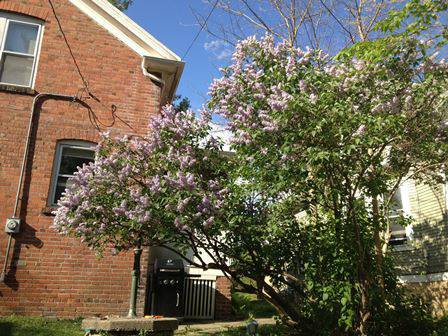
Bricks and lilac

Complete with pine trees

Complete with pine trees